Showing posts with label High Hopes Stamps. Show all posts

Sunday, November 30, 2008

O' Christmas Tree

Last year, our cats loved our Christmas tree. It was their first Christmas and they batted more than a few ornaments off the tree. Between the cats and our kids, all the nice ornaments go way up high on the tree! lol

I just received this Callie Christmas Kitty stamp and had to use it for this week's High Hopes Challenge. The challenge this week is Metal Madness brought to us by the very talented, Amy.

I had to use my new Basic Grey Wassail paper for my card and used Papertrey's ripe avocado cardstock because it is a perfect coordinating color. I started by stamping my kitty on white cardstock and cutting it out with a petite scalloped circle die. Then, I colored my image using copic markers.

I cut my card base and patterned papers and stitched them together. Then, I cut a piece of velvet olive ribbon. I attached it using some brads and added a silver metal Christmas tree and more brads in the corners of my card.

I stamped my sentiment on my card before adding my kitty to my card using foam adhesive. Isn't she cute?! I think I will be sending this Christmas card to my grandma because she loves kitties.

I actually got a photo of the copic markers I used again for this card. Be sure and stop by the High Hopes challenge blog. The divas have created some amazing stuff for the challenge and you won't want to miss it!

Have a Happy Sunday!!
signature
Recipe
Stamps: Callie Christmas Kitty (High Hopes Rubber Stamps), Merry and Bright (Papertrey Ink)
Cardstock: white, ripe avocado (Papertrey Ink)
Patterned Paper: Wassail (Basic Grey)
Accents: velvet olive ribbon, brads, metal Christmas tree (Making Memories)
Tools: copic markers, sewing machine, petite scalloped circle dies (Spellbinders)

Wednesday, November 26, 2008

Gavin is bringing birthday wishes

I got the chance this morning to play in the SCS sketch challenge. (Shh, don't tell anyone! I'm supposed to be cleaning house, baking pumpkin pies, and doing all the other stuff to get ready for Thanksgiving. *wink*)

Now, I'm not too sure about this card. I don't know for sure what it is that I don't like about it, but something is bothering me. It may be my need for layers under the patterned paper and on the card base. But anyway, I love this dragon! Actually, I love all the High Hopes dragons because they are so cute! Who would have thought a dragon could be cute?!

I stamped, cut out, and colored my dragon first. Then, I cut my card base and used a glue pad to stamp the pattern (using Papertrey's Background Basics Stars stamp set) and added red fun flock. It is nice and fuzzy! Then, I cut my patterned papers and added the black stitching. I tied a ripe avocado ribbon around one piece and added some brads and my sentiment before assembling my card. I added a little white pigment ink to the edges of my card for a little contrast. I did get fuzzy on my inkpad, of course, so I don't recommend using a good ink pad.

And I have to have a close up of Gavin' the Givin' Dragon just because he is cute!

Here is the copic marker colors I used to color the image. I don't usually list the colors because I rarely take a photo of a card the same day I make it, but I decided to snap a quick pic this morning when I made this card.


Hope everyone celebrating Thanksgiving tomorrow has a fabulous Thanksgiving! I better get busy! *wink*

signature
Recipe
Stamps: Gavin' the Givin' Dragon (High Hopes Rubber Stamps), Background Basics Stars, Mixed Messages (Papertrey Ink)
Cardstock: white (Papertrey Ink), night of navy (SU)
Patterned Paper: Box (Basic Grey)
Accents: ripe avocado stitched ribbon (Papertrey Ink), red and blue brads
Tools: copic markers, sewing machine, rectangle nestability die, red fun flock, glue pad, white pigment inkpad

Sunday, November 23, 2008

Kiss Me

Okay, is that not one of the funniest images you have ever seen?! I love Kissy Face Frog! I love frogs and this image is so funny. This week's High Hopes challenge is a sketch challenge brought to us by the amazingly talented Ila. You can see the sketch on the challenge blog. If you click on the photo, the red parts won't be fuzzy. Maybe it's just my computer, but the sentiment looks fuzzy and it's not really.

I usually always start my cards by coloring my images. So, I cut an oval shape and stamped my frog in the center. Then, I stamped my image again on a post-it note to create a mask and cut it out. Then, I used a pink copic marker and my air compressor to spray the pink around my frog while my oval was still in the die. Then, I removed the mask and colored my frog. I cut a black scalloped oval and added it to my frog. I added some dimensional glaze to my frog's lips and set it aside to dry.

Then, I cut all the layers for my card. I stamped the circle and heart pattern on some pink paper and then sewed it to the black layer. Then, I stamped the hearts and "love you" sentiment on the white and pink polka dot paper and sewed them to the black layers. I cut a ribbon slide for my sentiment, stamped the sentiment and created a black mat. I tied my ribbon and wrapped the piece around my patterned paper piece. I added all the patterned paper layers to my card. Then, I cut a red scalloped piece and added it. I added a chipboard heart and my image with some foam adhesive. Last, I added a few green buttons.

Another photo that shows the dimension a little better. The chipboard heart and the frog image are on foam adhesive.

Have you joined in the High Hopes challenges yet? Tina is so generous and has been having a random drawing each week among the participants with a free stamp as the prize. You have to join in for a chance to win! Be sure and check out all the design team ladies' creations for the challenge, too. They are always fabulous!

Have a great Sunday!
signature
Recipe
Stamps: Kissy Face Frog, Kiss Me (High Hopes Rubber Stamps), Love Circles (Art Warehouse)
Cardstock: white (Papertrey Ink), black, real red (SU)
Patterned Paper: SU retired
Ink: noir (Palette), pure poppy (Papertrey Ink)
Accents: chipboard heart, green buttons, red satin ribbon (Target)
Tools: copic markers, air compressor, oval nestability dies, ribbon slide (Spellbinders), scalloped punch (SU), sewing machine

Sunday, November 16, 2008

Santa's Surprise

It's time for another High Hopes challenge. This week's challenge is buttons and brads. I had a vision in my head of a row of altering buttons and brads. I'm not too sure that I like the Santa brads. My card didn't quite live up to my vision, but it was such a fun challenge. I think I will try it again some time with regular round brads and buttons.
I started out stamping and coloring my image (info below next photo). Then I cut all my layers and patterned papers. I added some stitching. Then, I wanted to use altering brads and buttons on top of some ribbon. So, I cut a slit in the spine of my card and slipped my ribbon through. Then, I stitched the buttons to the ribbon and added the brads and stuck the ribbon down. Then, I added my image and some more buttons in the corner.
I just love this Santa. I think he is so adorable. This is Santa's Surprise. I colored my image with copic markers. I added a little gray using koh-i-nor pencils and gamsol. It is light and great shading, but it is hard to see in the photo. Then, I created a mask and using a copic marker and an air compressor to spray the background around Santa. (It was originally a piece of white cardstock.)


I added some dimensional glaze to the candy cane and used a clear copic spica pen to add some glitter to the bows and ribbon on the presents. It was hard to photograph the glitter, but I finally got a photo that shows it pretty well.
I hope you join us in the challenge and have a great Sunday! Be sure and stop by the High Hopes challenge blog to see what all the design team ladies came up with. They are fabulous!
signature
Recipe
Stamps: Santa's Surprise (High Hopes Rubber Stamps)
Cardstock: pure poppy, white (Papertrey Ink)
Patterned Paper: Figgy Pudding (Basic Grey)
Accents: pure poppy stitched ribbon (Papertrey Ink), buttons, santa brads
Tools: copic markers, air compressor, sewing machine, dimensional glaze, copic spica pen, koh-i-nor pencil, gamsol

Wednesday, November 12, 2008

A Friend Like You is a Special Tweet!

I absolutely love the High Hopes dragons. They are all so adorable! Who knew a dragon could be that cute?! Every month High Hopes has a special where stamps are 25% off. This month's special is Lenny's Love Me Nots, Special Tweet saying, and Lg Ribbon/Rose 2 pc. set. You can purchase the set and see a couple more cards created by the design team using the set here.

I finally got a chance to make my card for the special and it was perfect timing because I used the SCS sketch 202 for my layout. I stamped Lenny and colored him in using copic markers. I then I cut all my layers. I sponged dark chocolate ink along the edges of the heart patterned paper before adding the red stitching.

I added all the layers and used foam adhesive to add my image and the ribbons and roses (after I cut them out). I sketched in the grass with a copic multi-liner pen before coloring.

Since there was stitching showing on the inside of my card from when I stitched the patterned paper to my card base, I decided to line the interior of my card. I cut a piece of pink cardstock slightly smaller than my card. Then, I cut a strip of patterned paper that was the same as that on my card front and stitched it to a piece of dark chocolate cardstock before adding it to my card.
Have a great day!
signature
Recipe
Stamps: Lenny's Love Me Nots, Special Tweet, and Lg Ribbon/Rose 2 pc. set (High Hopes Rubber Stamps)
Cardstock: white, dark chocolate, sweet blush (Papertrey Ink)
Patterned Paper: Blush (Basic Grey)
Tools: copic markers, sewing machine, square punch, scissors

Sunday, November 9, 2008

Sparklemania Challenge

This week's High Hopes challenge is sparklemania. I decided I wanted to use the new Festive Wreath image. I chose a piece of Basic Grey patterned paper and then colored my image in coordinating colors. Then, I sponged ink around my image while it was still in the nestability die. I cut all the layers for my card and added some gold to the edges of the ocean tide and pure poppy layers using a gold paint pen. Then, I embossed the ocean tides layer with an embossing folder and sewed the layers to my card base. To bring out the embossing more, I inked the raised embossing with an ocean tides ink pad. I cut a piece of patterned paper, added a pure poppy mat and used a punch to create the scalloped edge. I added some gold stickles to the circles in the patterned paper and let it dry. Then, I wrapped a gold ribbon around the piece, added a bow, and adhered everything to my card.


I used the gold paint pen on the beads on the wreath, some gold stickles to the poinsettia centers and added some shimmer to the wings. I added a pure poppy mat and used foam adhesive to add my image to my card.

Have a great day!

signature
Recipe
Stamps: Festive Wreath (High Hopes Rubber Stamps)
Cardstock: white, pure poppy, ocean tides, ripe avocado (Papertrey Ink)
Patterned Paper: Figgy Pudding (Basic Grey)
Ink: black (Momento), ocean tides (Papertrey Ink), antique linen distress ink (Ranger)
Accents: gold ribbon (Papertrey Ink)
Tools: copic markers, square nestability dies, sponge, scalloped border punch (SU), sewing machine, gold paint pen, gold stickles, angel wings (Shimmerz)

Sunday, November 2, 2008

Jingle All the Way

Is that Santa image not adorable or what?! I love the new Tropical Santa. This week's High Hopes challenge is brought to us by the amazing Crissy Armstrong and the challenge is to create a holiday card in non-traditional colors. I think I definitely accomplished that! As soon as I read the challenge, I immediately thought of this Santa and had to use him.

I stamped my image and then used a nestability die to cut it out. I added the specks for sand and the horizon line using a copic multiliner pen. Then, I colored my image with copic markers. I cut a mat from Taken with Teal cardstock and adhered my image. Then, I added some liquid applique to Santa's hat and heated it to make it nice and puffy.

I cut my card base and all my layers (card size is 6x6). I added some stitching and ribbon. Then, I stamped my sentiment and added my image and some buttons.

I just love this image! Heck, I love all the High Hopes images so it's no surprise! lol Be sure to check out all the design team cards on the challenge blog. Tina is also offering a random prize for the challenge so be sure to join us for the challenge as well. Who doesn't want an adorable stamp?!

Have a great day!

signature
Recipe
Stamps: Tropical Santa (High Hopes Rubber Stamps), Snowfall Additions (Papertrey Ink)
Cardstock: white (Papertrey Ink), Taken with Teal (SU)
Patterned Paper: Bali Breeze (SU - retired)
Ink: graphite black (Brilliance), noir (Palette)
Accents: purely pomegranate stitched ribbon (SU), white buttons
Tools: copic markers, circle nestability dies, sewing machine

Sunday, October 26, 2008

The Doctor is In

This week's High Hopes challenge is a sketch challenge (sketch created by the ultra-talented Katharina.) I love sketches because they make some of the assembly of the card so easy. I moved a couple things a tiny bit, but overall, it is pretty close to the sketch. I first stamped my medicine man on white cardstock and cut out the oval shape. I decided upon some colors and colored my image with copic markers. Then, I cut all my cardstock and patterned paper pieces. I used two different embossing folders to emboss the always artichoke and really rust cardstocks. After embossing, I inked the raised embossing by tapping an ink pad all over the pieces. I like how that helps bring out the embossing. I sewed my layers and started assembling my card. I added some ribbons and rain dots to finish off the front of my card.

I always have to have a close up so you can see the inking on the embossed cardstock and a close up of the Medicine Man.

I finished off the inside of my card by adding a really rust layer. Then, I stamped the sentiment. Love that sentiment. I stamped the brewing pot on white cardstock, colored it, and cut it out. I added it to the corner of my card with dimensional foam adhesive.

Be sure to check out all the design team creations for the challenge and join us! Leave me your link if you join in the challenge.
signature
Recipe
Stamps: Medicine Man, Doctor is In, Potion, Bubbling Brew (High Hopes Rubber Stamps)
Cardstock: white (Papertrey Ink), really rust, black, always artichoke, soft sky (SU!)
Patterned Paper: Boxer (Basic Grey)
Ink: black (Momento), noir, cognac (Palette), ripe avocado (Papertrey Ink)
Accents: rain dots, soft sky ribbon (SU!)
Tools: copic markers, sewing machine, embossing folders (provo craft), oval nestability dies (Spellbinders)

Thursday, October 23, 2008

ready to party?!

This weekend, we are having my son's 5th birthday party. I can't believe he is 5 already!! My baby boy is 5! This week's High Hopes challenge fit in perfectly with the coming party. This week's challenge is to create anything but a card. I decided to alter a gift bag. (Click on the photo for a larger version where you can see more details.)

I started out stamping Party Cat on white cardstock and coloring it with copic markers. I used a pair of my old decorative scissors to cut the layers for my image. Then, I sewed the layers together and added the image to my bag. I stamped some presents (Hanna Stamps Perfect Package set) on white cardstock, cut them out, and added them with foam adhesive to my bag.

I also stamped the balloons again on white cardstock and colored them with copic markers. Then, I added some dimensional glaze to the balloons and let it dry. After it was dry, I cut the balloons out and added them with foam adhesive over the image for more dimension.

I wanted to add a tag to my bag, too. I used the Perfect Package stamp set again. Then, I stamped the sentiment (Papertrey Ink's It's a Celebration set). I cut the layers and added an eyelet. I tied it to the handle of my bag with white polka dot ribbon.
Then, I cut a bunch of strips of ribbon different lengths and created the pom pom like ribbon bundle. I used a rubber band to hold the ribbons. I also added an extra ribbon through the back of the rubber band and used it to tie the ribbon bundle to the bag.

Have a great day!!
signature
Recipe
Stamps: Party Cat (High Hopes Rubber Stamps), Perfect Package (Hanna Stamps), It's a Celebration (Papertrey Ink)
Cardstock: white (Papertrey Ink), real red, always artichoke, tempting turquiose (SU)
Ink: black (Momento), noir (Palette)
Accents: ribbons, large eyelet
Tools: copic markers, decorative scissors, sewing machine, scissors, crop-a-dile, dimensional glaze

Sunday, October 12, 2008

Joy and Wonder fill the season

This week's High Hopes challenge is to sew on your card (faux or real). I absolutely adore the High Hopes snowmen and snow ladies so I had to use one on my card. This is Snow Sweet Snowlady. I stamped and colored my image using copic markers. Then, I cut it out using a nestability die. While the image was still in the die, I sponged Antique Linen distress ink around my image. I found some great gold thread at my local craft store. I used it to sew my image to it's mat. Then, I added some gold stickles to the poinsettia and the snowlady's scarf and set it aside to dry while I made the rest of my card. I did not have any gold brads so I made my own with embossing powder. More layers, a little more stitching and ribbon and my card was done.


It doesn't show up well in the photo, but the thread is a nice, shiny gold. I love the extra sparkle it adds to the card. Isn't the snowlady adorable, too?!

I'm spending some time scrapbooking and really enjoying it. I'm trying to break myself of having to scrapbook chronologically. I like to have everything in order, but I've really been wanting to do more journaling about what is going on right now. One of the layouts I just finished is about my son who will turn five soon. I really enjoyed making something with more current photos. Hope everyone is having a great weekend!
signature
Recipe
Stamps: Snow Sweet Snowlady (High Hopes Rubber Stamps), Christmas Wishes (Papertrey Ink)
Cardstock: wild wasabi, real red, baja breeze (SU!), white (Papertrey Ink)
Patterned Paper: Figgy Pudding (Basic Grey)
Ink: black (Momento), noir (Palette), Antique Linen distress ink (Ranger)
Accents: brads, wild wasabi ribbon (SU!), gold thread, gold stickles (Ranger)
Tools: copic markers, sewing machine, rectangle nestability die, heat gun, gold embossing powder, sponge

Wednesday, October 8, 2008

A Good Friend is Easy to Spot

Phew! I finally got my stuff done for the next Papertrey Ink release. Then, my computer decided to give me fits when I try to download the photos from my camera. I finally got it to transfer and now I just have to edit all the photos and upload them to the gallery. You all are going to love the new sets!

I also finally got a chance to take a photo of my card for the High Hopes challenge. The challenge is to use blue, brown, green and any neutral. I just love this giraffe from High Hopes. His name is Stretch. Isn't he cute?! I chose my papers, cardstocks, and ribbon and then set about coloring my image with copic markers.


I used the embossed edge as a guide for my grass and sky, leaving a nice white border. I added the grass using a copic multiliner pen. Then, I cut all my layers, added my sentiment and some stitching, scallops, and ribbon.

Well, I have to run and get the kiddos in bed. Have a great day!!

signature
Recipe
Stamps: Stretch, Easy to Spot (High Hopes Rubber Stamps)
Cardstock: white (Papertrey Ink), old olive, close to cocoa, baja breeze (SU!)
Patterned Paper: polka dots (Wild Asparagus - My Mind's Eye), brown stripe (LilyKate - Basic Grey)
Accents: chocolate chip ribbon (SU!)
Tools: threading water punch (Fiskars), copic markers, long rectangle nestability dies, sewing machine

Tuesday, September 30, 2008

Thar be a birthday fast approaching!

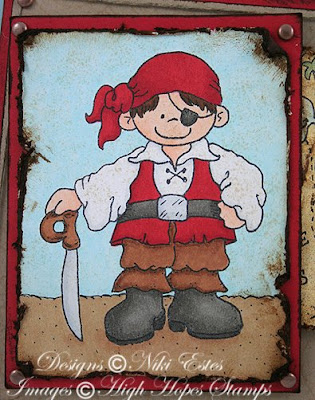
I am so excited that the High Hopes design team started a challenge blog. They are one of my favorite stamp companies so I had to play along. This week's challenge is to make a birthday card and use brads. I can't help but say this is one of my favorite cards I have made in a long time. It was lots of fun to get all inky and distressed.

I started out by stamping On Guard Oberto and the treasure map on white cardstock. I started out coloring the map with copic markers. Then, I wrinkled it all up and distressed and tore the edges of the map. Then, I added some antique linen ink all over the map with a sponge. Then, I used the chocolate ink pad directly on the map to ink the high spots and the edges. Doesn't it look like an old torn up treasure map?!

Next, I moved on to Oberto. I wanted the image to look like an old worn photo so I did the same steps with him: colored with copic markers, distressed edges, inked with antique linen and chocolate ink.
Next, I cut all the layers for my card and inked the edges of the red layers. Then, I stamped the ships wheel in antique linen ink on the kraft paper for a subtle pattern. I stamped my sentiment in the lower right corner and added brads to the corners. Then, I wrapped the hemp around the brads and tied at the bottom. Then, I assembled all the layers. I added the map and Oberto to the card using dimensional foam so you can definitely see all the dimension, especially in the wrinkly map.

Here you can see the subtle pattern paper I made with the ships wheel stamp.


I wanted to finish the inside of my card as well so I cut cardstock layers to match the front and inked the edges. Then, I stamped the ships wheel again on the kraft cardstock. I stamped the sentiment and assembled the layers.

Last, I stamped the treasure chest on white cardstock and colored it with copic markers. I cut it out and then distressed the image with antique linen and chocolate ink.

This was such a fun card to make! I can't wait to play along with the next challenge. Have a great day!

signature
Recipe
Cardstock: white, kraft (Papertrey Ink), real red, baja breeze (SU!)
Ink: black (Momento), antique linen distress ink (Ranger), chocolate paper stain (All My Memories), noir (Palette)
Accents: copper brads (Making Memories), hemp
Tools: copic markers, edge distressor, sponge

Sunday, August 24, 2008

feeling a little eel?

I got a chance to play along with another featured stamper challenge today. This week's featured stamper is Kokirose aka Patricia. She is a sweetie and has a great gallery. This is the card I chose to case. Rules are you must change at least 2 or more things. I changed the following:

* the image
* changed the stitching to piercing
* added the color soft sky and kept the old olive and black
* changed the scallop layer
* changed how my sentiment is added

I got a chance to scrapbook Friday and it was so nice. I plan to do a little more this afternoon. I miss scrapbooking more so I'm going to be fitting it into my schedule better. That may mean a few less cards here and there. I feel weird about not wanting to post photos of my kids on my blog. I see so many people do it. Am I just weird about this? If I shared my layouts occasionally, it would make it easier finding the time to fit scrapbooking into my schedule. Hmm.
signature
Recipe
Stamps: Edgar Eel, A little eel (High Hopes Rubber Stamps)
Cardstock: white (Papertrey Ink), old olive, black, soft sky (SU)
Patterned Paper: soft sky, old olive (SU - retired)
Ink: soft sky (SU), noir (Palette), graphite black (Brilliance)
Accents: black satin ribbon (Target)
Tools: copic markers, sponge, slot punch (Making Memories), paper piercer, mat pack (SU)

Sunday, August 10, 2008

Hugs and Fishes!

I got a chance to play in the featured stamper challenge over on SCS today. I love getting to look through the galleries and pick just the right card to case. This week's featured stamper is Kim aka blondie090277. This is the card I chose to case. I changed the following:
* colors
* image
* layers
* embossing folder
* how I added the sentiment


Isn't Puff Fishy adorable!? lol I cut my oval out, stamped my fish in the center, and while it was still in the die, I sponged soft sky around my fish. Then, I colored him with copic markers. As a last step to finish my card, I added dimensional glaze to his fishy lips.
signature
Recipe
Stamps: Puff Fishy, Hugs and Fishes (High Hopes Rubber Stamps)
Cardstock: white (Papertrey Ink), pumpkin pie, pacific point (SU!)
Patterned Paper: soft sky (SU!)
Ink: graphite black (Brilliance), soft sky (SU!)
Accents: orange ribbon, orange dew drops (Robin's Nest)
Tools: copic markers, nestability dies, dimensional glaze, sponge dauber, embossing folder (cuttlebug)